Understanding Ham Shanks
Ham shanks, often enjoyed during holidays, are flavorful cuts perfect for slow cooking; understanding their preparation unlocks delicious results for family gatherings.
What is a Ham Shank?
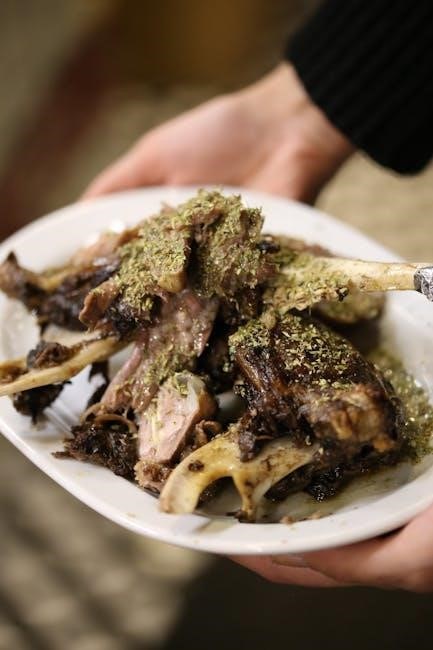
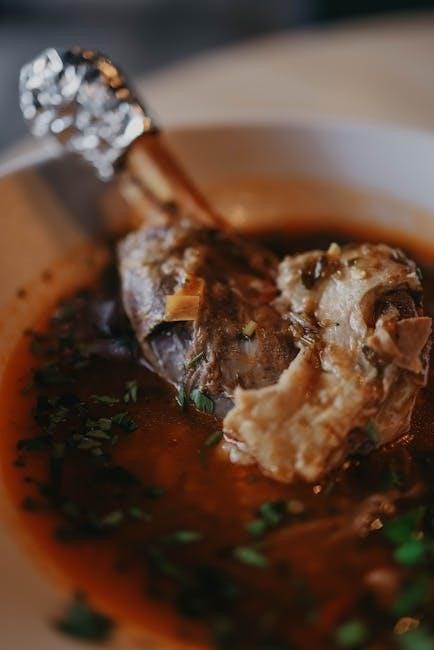
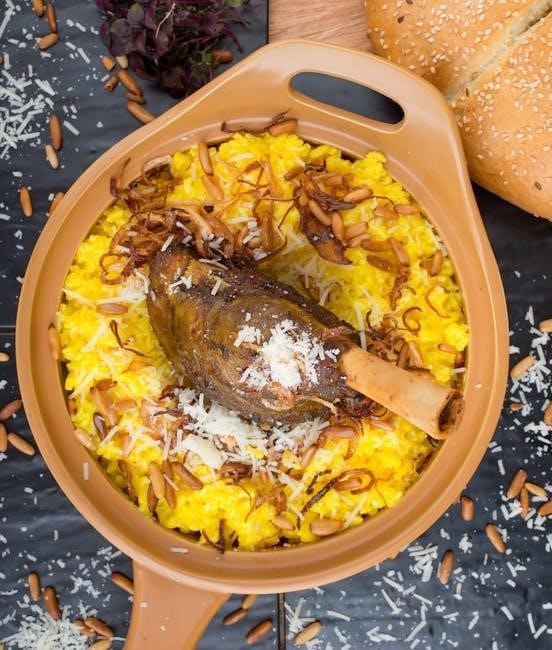
Ham shanks are portions cut from the leg of a pig, specifically the lower part, offering a robust, meaty flavor. They contain bone, connective tissue, and a significant amount of muscle, making them ideal for long, slow cooking methods. Unlike a fully formed ham, a shank requires extended cooking to become tender and succulent.
Often sold smoked or fresh, the shank’s inherent richness benefits from moisture-retaining techniques during preparation. It’s a budget-friendly alternative to more expensive cuts, delivering substantial flavor when braised, baked, or slow-cooked. The bone contributes significantly to the depth of flavor in any resulting broth or sauce, making it a versatile ingredient.
Types of Ham Shanks (Smoked, Fresh)
Ham shanks primarily come in two varieties: smoked and fresh. Smoked ham shanks have been cured and smoked, imparting a distinct smoky flavor and often requiring less additional seasoning. They are typically pre-cooked, needing only to be heated through, though longer cooking enhances tenderness.
Fresh ham shanks, conversely, are uncured and unsmoked, resembling pork more closely. These require full cooking to reach a safe internal temperature and develop flavor. They benefit greatly from marinades or glazes to add moisture and complexity. Choosing between the two depends on your preference for smoky flavor and desired cooking time.
Preparing the Ham Shank for Cooking
Proper preparation is key! Thawing, rinsing, scoring, and trimming fat enhance flavor and ensure even cooking for a tender, delicious ham shank experience.
Thawing a Frozen Ham Shank
Safely thawing a frozen ham shank is crucial for even cooking and optimal flavor. The recommended method is refrigeration, allowing approximately 4-6 hours per pound. Place the shank in its original packaging on a tray to catch any drips, preventing cross-contamination in your refrigerator.
For a smaller shank (under 5 pounds), this might take a full day. Avoid thawing at room temperature, as this encourages bacterial growth. If you’re short on time, you can submerge the shank in cold water, changing the water every 30 minutes, allowing about 30 minutes per pound.
Ensure the shank is fully thawed before proceeding with preparation; a partially frozen shank will cook unevenly. Always verify the internal temperature reaches a safe level during cooking.
Rinsing and Patting Dry
After thawing, thoroughly rinse the ham shank under cold running water. This removes any ice crystals or lingering surface impurities that may have accumulated during the freezing or thawing process. Gently scrub the shank to ensure a clean surface, preparing it for further preparation steps.
Following the rinse, it’s essential to pat the shank completely dry with paper towels. Excess moisture can hinder browning during cooking and affect the glaze’s adherence. A dry surface promotes a beautiful, caramelized exterior.
This step is vital for achieving optimal texture and flavor. A properly dried shank will yield a more satisfying final product, enhancing the overall dining experience.
Scoring the Ham Shank
Scoring the ham shank involves making shallow cuts in a diamond pattern across the fat cap. This process doesn’t penetrate the meat itself, but rather creates channels for heat to penetrate more effectively, rendering the fat and enhancing flavor. Use a sharp knife and make cuts approximately ¼ inch deep and spaced about an inch apart.
Scoring also allows glazes and marinades to better adhere to the surface, infusing the ham with even more deliciousness. The pattern not only improves cooking but also presents a visually appealing finished product.
This technique is crucial for a tender, flavorful, and beautifully presented ham shank.
Trimming Excess Fat
Trimming excess fat from the ham shank is a vital step, though complete removal isn’t necessary. A thin layer of fat contributes to moisture and flavor during cooking. However, a very thick fat cap can prevent seasonings and glazes from properly penetrating the meat.
Using a sharp knife, carefully trim most of the fat cap, leaving about ¼ inch. This allows for rendering during baking, basting the ham and keeping it succulent. Focus on removing any loose or overly thick portions.
Proper trimming ensures optimal flavor absorption and a beautifully rendered finish.

Cooking Methods for Ham Shanks
Ham shanks excel with baking, slow cooking, or pressure cooking; each method delivers tender, flavorful results, adapting to your schedule and preference.
Baking a Ham Shank
Baking a ham shank is a classic method, yielding a beautifully presented and flavorful result. Begin by preheating your oven to 325°F (160°C). Place the shank in a roasting pan, ideally with a rack to elevate it. Adding about two inches of water to the pan helps maintain moisture during the extended cooking time.
Covering the pan initially helps retain moisture, but uncovering it during the last hour allows for some caramelization of any glaze you might apply. A general guideline is to bake for approximately 15-20 minutes per pound, but always rely on a meat thermometer for accuracy. Consistent monitoring ensures a perfectly cooked, tender ham shank ready for serving.
Slow Cooking a Ham Shank
Slow cooking a ham shank delivers exceptional tenderness and allows flavors to meld beautifully. Place the shank in your slow cooker and add enough liquid – water, broth, or even apple cider – to come about halfway up the side. A low setting is ideal, requiring approximately 6 to 8 hours of cooking time.
For a richer flavor, consider adding aromatics like onions, garlic, and herbs to the slow cooker. Because ham shanks are often pre-cooked, the goal isn’t necessarily to “cook” through, but to warm it thoroughly and enhance its flavor profile. Ensure the internal temperature reaches 140°F (60°C) before serving.
Pressure Cooking a Ham Shank
Pressure cooking dramatically reduces cooking time while maintaining incredible flavor and tenderness in a ham shank; Add approximately 1-2 cups of liquid – broth or water work well – to the pressure cooker pot. Place the shank inside, ensuring it’s partially submerged. Secure the lid and cook on high pressure for roughly 45-60 minutes, depending on the shank’s size.
Allow for a natural pressure release, which takes about 15-20 minutes. This prevents the ham from becoming dry. Always verify the internal temperature reaches 140°F (60°C) with a meat thermometer before serving. Pressure cooking is a fantastic option for a quick, yet flavorful, meal.
Baking Instructions: Detailed Guide
Baking a ham shank requires a 325°F (163°C) oven, typically 15-20 minutes per pound, ensuring a moist and flavorful result for your holiday feast.
Oven Temperature and Time (Based on Weight)
Determining the correct baking time for your ham shank is crucial for achieving optimal tenderness and flavor. A consistent oven temperature of 325°F (163°C) is generally recommended throughout the cooking process. For a ham shank weighing between 10 to 12 pounds, allocate approximately 2 ½ to 2 ¾ hours of baking time.
If you are preparing a fully cooked, bone-in ham half, no additional water is needed in the roasting pan. For a 6 to 8 pound ham, a baking duration of around 1 hour is usually sufficient to reach the desired internal temperature. Remember these times are estimates; always verify doneness with a meat thermometer.
Adding Liquid to the Roasting Pan
Maintaining moisture during baking is key to a succulent ham shank. Pour approximately 2 inches of water into the bottom of the roasting pan before placing the ham inside. This creates a humid environment, preventing the ham from drying out during the extended cooking time. Covering the pan tightly with a lid further enhances this effect, trapping steam and ensuring even cooking.
Some cooks prefer to use other liquids, such as apple cider or broth, for added flavor. Regardless of the liquid chosen, ensure it doesn’t fully submerge the ham, allowing for proper heat circulation.
Covering vs. Uncovering During Baking
The decision to cover or uncover a ham shank during baking significantly impacts its final texture and glaze development. Initially covering the ham with a lid or foil for the first half of the cooking time traps moisture, preventing dryness and ensuring even cooking. However, uncovering the ham during the last portion – roughly the final 30-60 minutes – allows the surface to caramelize and the glaze to set beautifully.
This dual approach yields a moist interior with a delightfully sticky and flavorful exterior. Adjust timing based on your desired glaze consistency.

Internal Temperature and Doneness
Achieving a 140°F (60°C) internal temperature, verified with a meat thermometer, guarantees a perfectly cooked, safe, and flavorful ham shank for serving.
Using a Meat Thermometer
Employing a meat thermometer is absolutely crucial for ensuring your ham shank reaches a safe and delectable internal temperature. Insert the thermometer into the thickest part of the shank, avoiding the bone, to obtain an accurate reading. Digital thermometers provide quick and precise results, while traditional models require a bit more patience. Regularly monitor the temperature during the final stages of cooking, especially when baking or slow cooking, as temperatures can fluctuate. Remember, relying on visual cues alone can be unreliable; a thermometer is your best friend for perfectly cooked ham. Consistent monitoring guarantees a juicy and flavorful outcome, preventing undercooking or overcooking.
Target Internal Temperature (140°F)
Achieving an internal temperature of 140°F is paramount for a safely and deliciously cooked ham shank. This temperature ensures any potentially harmful bacteria are eliminated, while still maintaining the ham’s moisture and flavor. Fully cooked hams simply require reheating to this temperature, whereas fresh hams need to reach a higher internal temperature for safety. Use a reliable meat thermometer to verify, inserting it into the thickest portion, avoiding the bone. Remember, carryover cooking will continue to raise the temperature slightly after removal from the heat source, so aim to remove it just before reaching 140°F.
Glazes and Marinades
Sweet glazes, like brown sugar or honey mustard, beautifully complement ham shanks, enhancing flavor and creating a delightful caramelized crust during baking.
Popular Glaze Recipes (Brown Sugar, Honey Mustard)
Brown Sugar Glaze: Combine ¾ cup packed brown sugar, ¼ cup honey, 2 tablespoons Dijon mustard, and a pinch of ground cloves. This classic glaze delivers a rich, sweet, and slightly spicy flavor profile that beautifully caramelizes on the ham shank during baking. Apply generously during the last 30-45 minutes of cooking.
Honey Mustard Glaze: Whisk together ½ cup honey, ¼ cup Dijon mustard, 2 tablespoons apple cider vinegar, and 1 teaspoon paprika. This glaze offers a delightful balance of sweet and tangy notes, creating a vibrant and flavorful crust. Brush onto the ham shank during the final 30 minutes of baking for optimal results. Both glazes elevate the ham’s natural flavors.
Marinating for Enhanced Flavor
Marinating a ham shank, though not always necessary with pre-cooked varieties, significantly boosts its flavor complexity. A simple marinade can consist of apple juice, brown sugar, pineapple juice, and a touch of cloves. Submerge the shank for at least 4 hours, or ideally overnight, in the refrigerator, ensuring full coverage.
This process allows the flavors to penetrate the meat, resulting in a more succulent and aromatic final product. For a savory twist, incorporate Dijon mustard, garlic powder, and a splash of Worcestershire sauce into your marinade. Remember to discard the marinade after use and never reuse it.
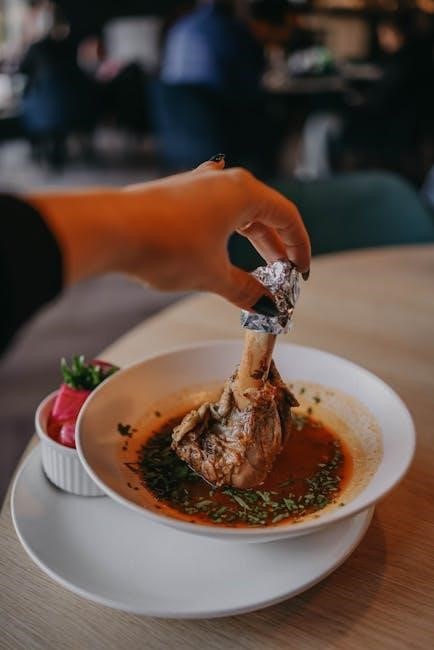
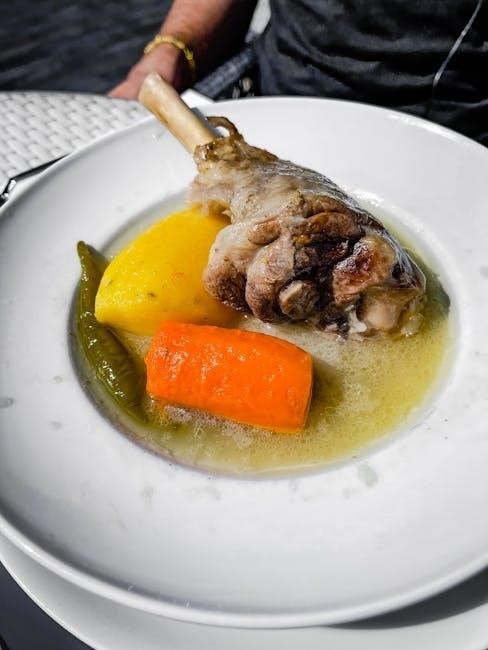
Serving and Carving
Allow the cooked ham shank to rest for at least fifteen minutes before carving, ensuring juicy slices and maximizing flavor for a delightful experience.
Resting Time After Cooking
Allowing the ham shank to rest after cooking is a crucial, often overlooked, step that significantly impacts the final result. This resting period, typically around 15-30 minutes, allows the juices within the meat to redistribute throughout, resulting in a more tender and flavorful experience. During cooking, the heat forces these juices towards the center; resting allows them to flow back into the muscle fibers.
Without this rest, carving immediately will result in a drier ham shank as the juices will simply run out. Tent the ham loosely with foil during resting to maintain warmth without continuing the cooking process. Patience during this phase truly elevates the enjoyment of your perfectly cooked ham shank!
Carving a Ham Shank
Carving a ham shank requires a sharp knife and a bit of technique to maximize yield and presentation. Begin by identifying the bone; slicing with the grain yields more tender pieces, while slicing against it creates shorter, chewier bites. Start by making long, even slices down the length of the shank, following the natural curve of the bone.
Work your way around the bone, removing large portions of meat. Once you’ve removed as much meat as possible with larger slices, go back and trim any remaining pieces. Remember to check for smaller pockets of meat nestled near the bone – don’t waste any flavorful morsels!
Leftovers and Storage
Cooked ham shank leftovers are incredibly versatile! Store properly refrigerated in airtight containers for up to a week, or freeze for longer enjoyment.
Storing Cooked Ham Shank
Proper storage is crucial for maintaining the quality and safety of your cooked ham shank. Allow the ham to cool completely before storing, typically within two hours to prevent bacterial growth. Wrap the ham tightly in plastic wrap, ensuring all surfaces are covered to prevent drying out.
Then, place the wrapped ham in an airtight container or a heavy-duty freezer bag. Refrigerated cooked ham shank will generally stay fresh for approximately 3 to 4 days. For longer storage, freezing is an excellent option. Properly frozen, it can maintain quality for up to 2 months. Label the container with the date for easy tracking!
Reheating Options
Several methods effectively reheat your cooked ham shank, restoring its delicious flavor. For smaller portions, microwave reheating is convenient; cover with a damp paper towel to retain moisture and reheat in short intervals. However, oven reheating is preferred for larger pieces, ensuring even heating and preventing dryness.
Wrap the ham in foil with a little broth or water to maintain moisture, then bake at 325°F (160°C) until warmed through. Alternatively, slow cooking on low heat is a gentle method, ideal for preserving tenderness. Always ensure the internal temperature reaches 140°F (60°C) before serving for food safety.
Troubleshooting Common Issues
Dry ham can be remedied with added liquid during baking, while excessive saltiness might be reduced by soaking the shank beforehand in water.
Ham Shank is Dry
A dry ham shank often results from insufficient moisture during the cooking process. To combat this, ensure you’re adding enough liquid – water, broth, or even juice – to the roasting pan. Maintaining a consistent oven temperature is also crucial; fluctuations can lead to uneven cooking and dryness.
Consider covering the ham shank for a portion of the baking time to trap moisture, then uncovering it during the last phase to allow for some browning. Basting the shank periodically with pan juices or a glaze can also help keep it moist. Remember, a meat thermometer is your best friend; removing the ham shank from the oven at the correct internal temperature prevents overcooking and subsequent dryness.
Ham Shank is Too Salty
If your ham shank tastes overly salty, it’s likely due to the natural salt content inherent in cured hams. To mitigate this, consider soaking the shank in water for a few hours before cooking, changing the water several times. This helps draw out some of the excess salt.
Avoid adding any additional salt during the cooking process. Pairing the ham shank with sweet accompaniments, like a brown sugar glaze or fruit chutney, can also balance the saltiness. Serving it with a side of creamy mashed potatoes or rice helps absorb some of the salt, creating a more palatable experience.
Safety Considerations
Food safety is paramount; ensure proper handling, cooking to 140°F, and prevent cross-contamination to enjoy a safe and delicious ham shank experience.
Food Safety Guidelines
Maintaining food safety throughout the ham shank preparation process is crucial for preventing foodborne illnesses. Always begin with clean hands, surfaces, and utensils. Thoroughly wash your hands with soap and warm water before and after handling raw ham. Ensure the ham shank reaches an internal temperature of 140°F (60°C) as measured with a reliable meat thermometer to eliminate harmful bacteria.
Proper thawing is also essential; never thaw at room temperature. Utilize the refrigerator, cold water, or microwave (followed by immediate cooking). Avoid cross-contamination by keeping raw ham separate from cooked foods and using dedicated cutting boards and utensils. Remember to promptly refrigerate any leftover ham shank within two hours of cooking.
Preventing Cross-Contamination
Cross-contamination poses a significant risk when preparing ham shanks, potentially spreading harmful bacteria. Always use separate cutting boards – one for raw ham and another for cooked foods or produce. Thoroughly wash all utensils, countertops, and your hands with hot, soapy water after contact with raw ham. Never place cooked ham back onto a plate or surface that previously held raw ham.
Store raw ham in sealed containers at the bottom of the refrigerator to prevent drips from contaminating other foods. When carving, use clean knives and serving dishes. Proper hygiene and diligent separation of raw and cooked items are vital for a safe and enjoyable meal.